I make a commission from purchases made through links in my posts, at no extra cost to you. Read my disclosure for more information.
Do you know that you can use Cricut removable matte vinyl to design custom wood projects? In this illustrated tutorial, I will show you step by step how I decorated a piece of painted wooden furniture with Cricut removable matte vinyl to create custom wood projects. I decorated a painted wooden changing table and crib combo with Cricut removable matte vinyl in my daughter’s nursery.
Can You Use Cricut Removable Matte Vinyl On Wood Projects?
You can easily design custom wood projects and furniture using Cricut removable matte vinyl. You can use removable matte vinyl to decorate wood dressers, chairs, bed frames, picture frames, and much more! You can also use other removable matte vinyl products from Cricut to create custom wood projects.
How To Use Cricut Removable Matte Vinyl On Your Wood Project?
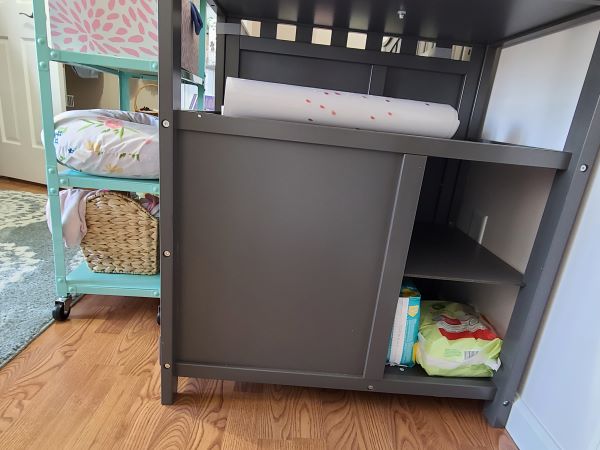
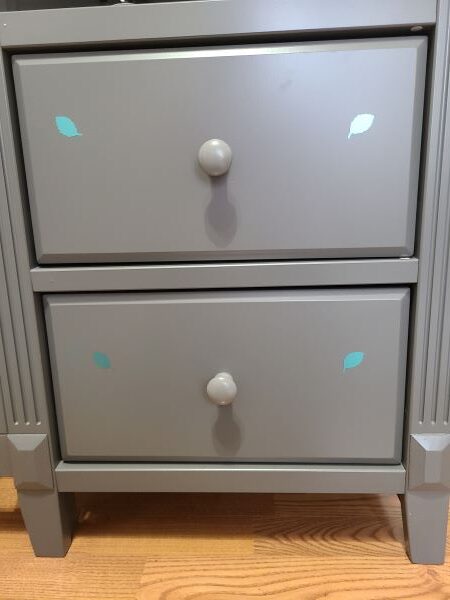
You will want to measure where you want to apply your removable matte vinyl. That way you can scale the size of your design before cutting it out of the vinyl. For this custom furniture design, I will be decorating the change table side panels and drawer panels in my daughter’s nursery.

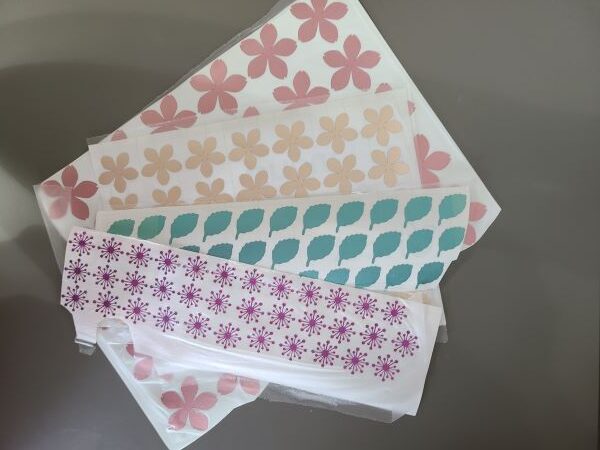
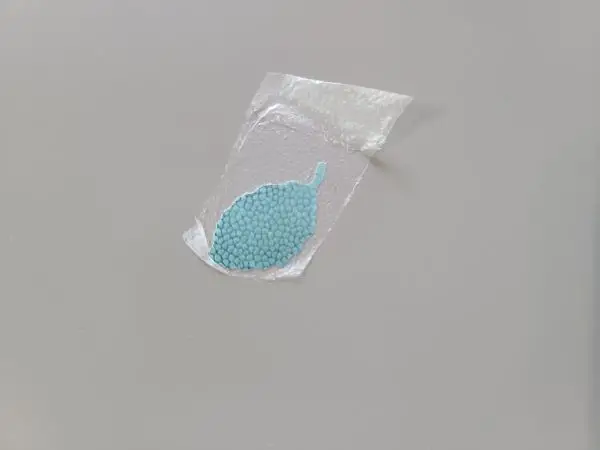
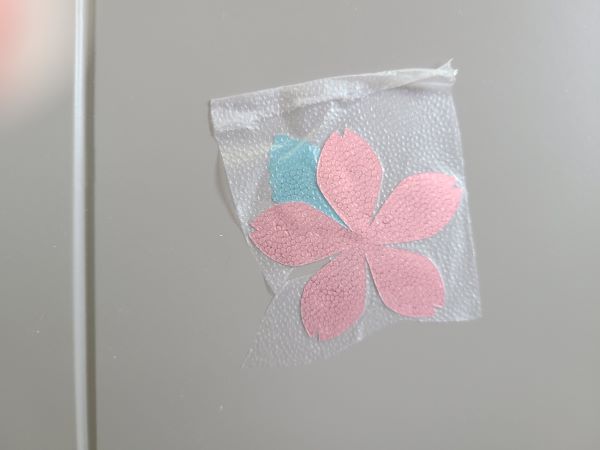
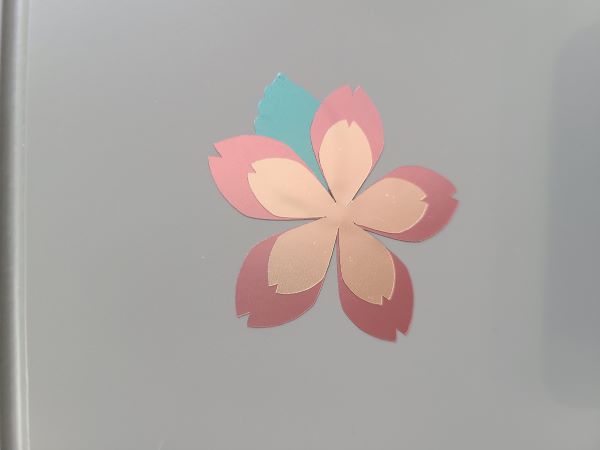
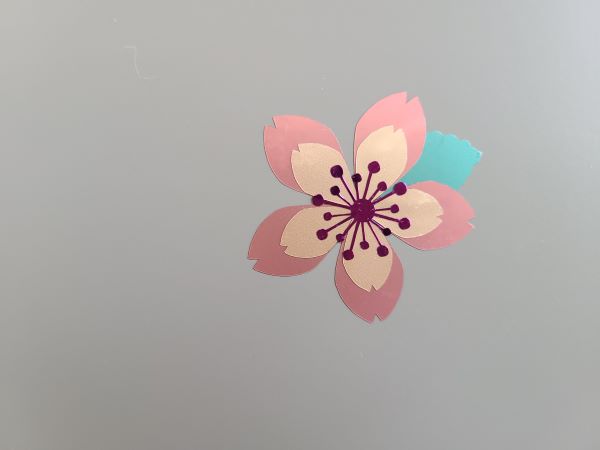
For this vinyl project, I did a four-layered cherry blossom. Each finished flower will be 1 3/4 inches wide, if you add the leaf then your complete flower will 2 inches wide. Below on the left are the removable adhesive vinyl sheets with the Glad Press and Seal on top, that I cut out using my Cricut. On the right is an example of each piece of the flower layer as it is assembled.
Note: This flower pattern is not my design. It was created by Jennifer Maker at jennifermaker.com, I was able to use it for free on my furniture project.

How To Apply Removable Matte Adhesive Vinyl To Your Wood Project?
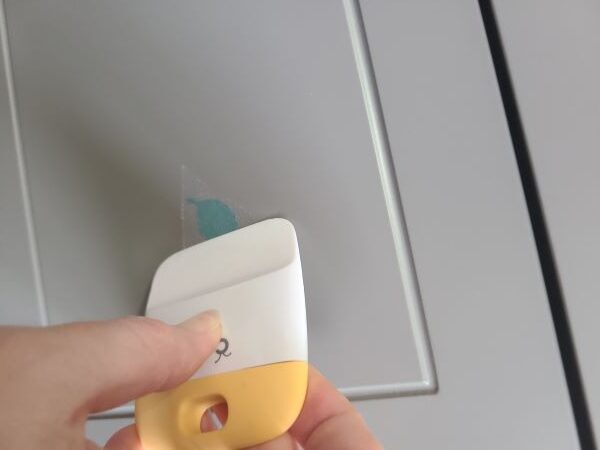
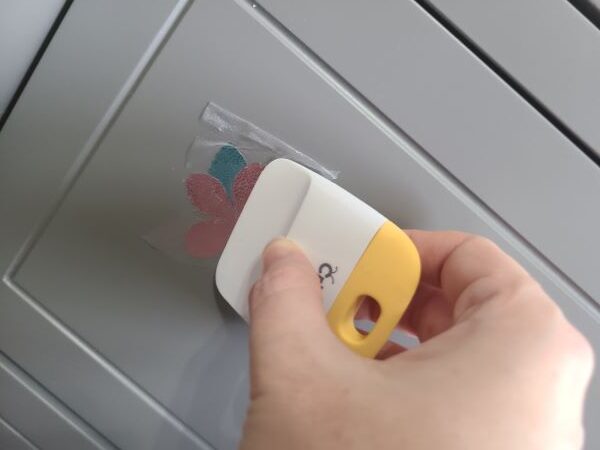
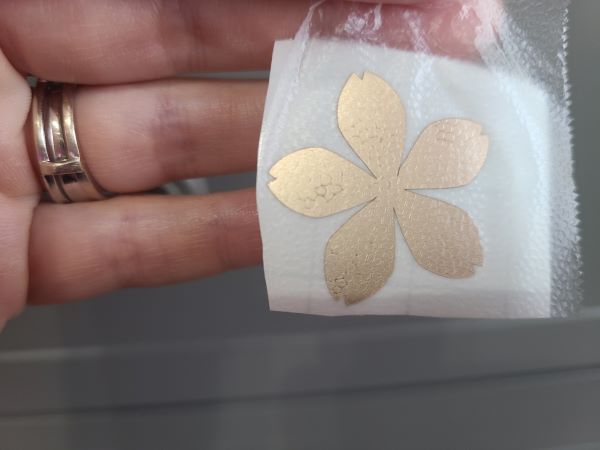
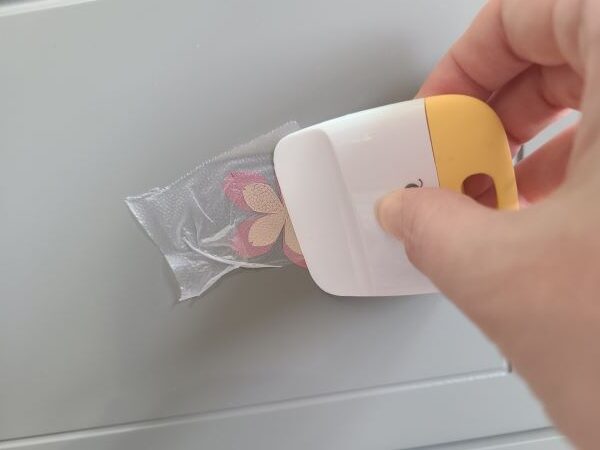
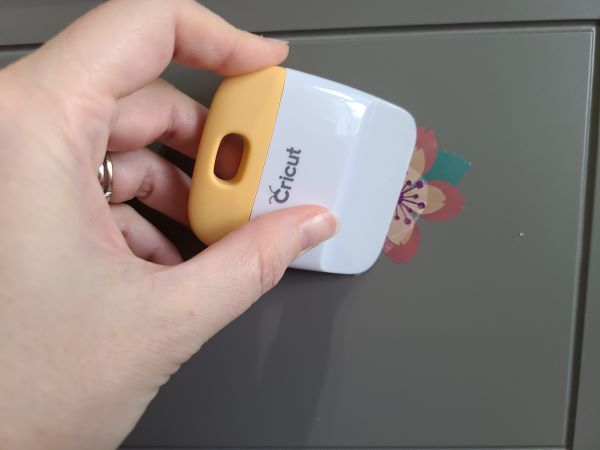
Make sure to use the Cricut rubbing tool or an old plastic gift card to transfer your vinyl decal to the transfer tape. I like using Glad Press and Seal instead of transfer tape because is it cheaper than the transfer tape. The Glad Press and Seal rolls are bigger, and it lasts a lot longer than a roll of transfer tape.
Using rubbing alcohol and a lint-free cloth wipe down the painted wood surface. This will be where you would like to apply your adhesive foil vinyl. Make sure the area is dry before placing the adhesive foil vinyl on the wood.
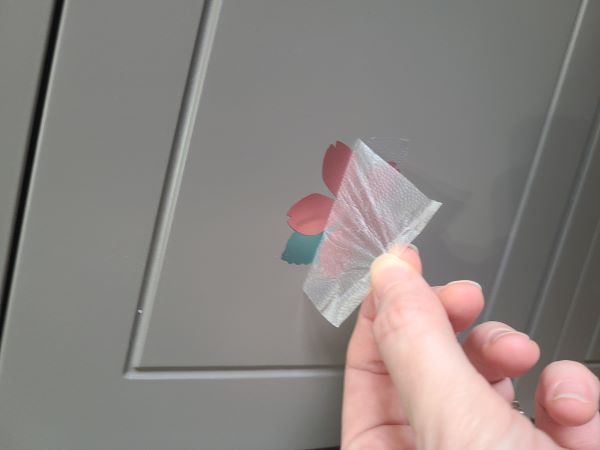
If required, trim away additional vinyl pieces from the Cricut backing paper as needed according to your chosen design. Peel off the paper backing, leaving the adhesive foil vinyl on the sticky transfer tape or Glad Press and Seal sheet. Attached the transfer material and removable adhesive vinyl to the clean wood furniture surface. Using the Cricut rubbing tool or an old plastic gift card to transfer your vinyl decal onto your clean project area.
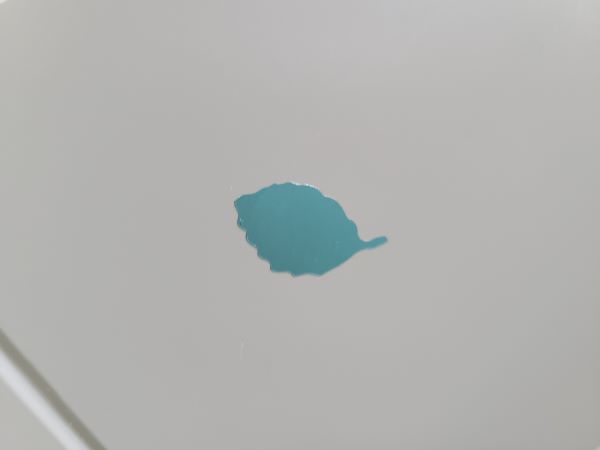
Note: If you are doing a large vinyl decal you will want to fold your transferring material and vinyl decal design using the taco method. Place your vinyl decal in the center of your vinyl project area. This will help avoid air bubbles and creases in your transfer tape and design. You can reposition your design as needed before rubbing to transfer your vinyl to the project surface.
Subscribe to Nerdy Moms United!
Get updates on the latest posts and more straight to your inbox!
How To Apply The Second Layer of Removable Matte Adhesive Vinyl To Your Wood Project?
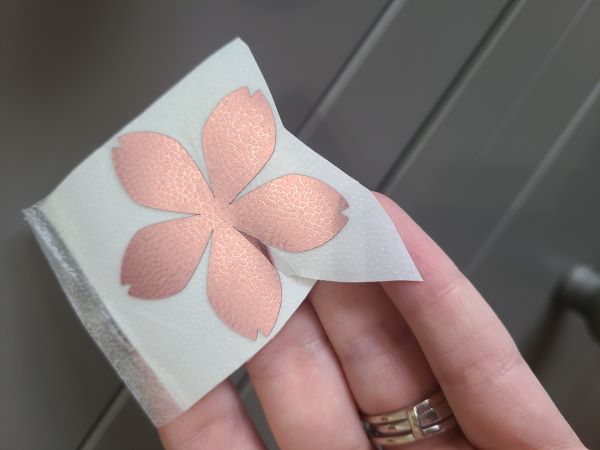
Following the same process you will attach the large removable matte adhesive vinyl flower on top of the leaf.
- Trim the large adhesive flower with transfer material on top.
- Place the large adhesive flower on top of the leaf.
- Transfer the large adhesive flower by rubbing it with your Cricut rubbing tool.
- Peel the transfer material off of the large adhesive flower.
How To Apply The Third Layer of Removable Matte Adhesive Vinyl To Your Wood Project?
Using the same process you will attach the small removable matte adhesive vinyl flower in the center of the large flower.
- Trim the small adhesive flower with transfer material on top.
- Place the small adhesive flower in the center of the large flower.
- Transfer the small adhesive flower by rubbing it with your Cricut rubbing tool.
- Peel the transfer material off of the small adhesive flower.
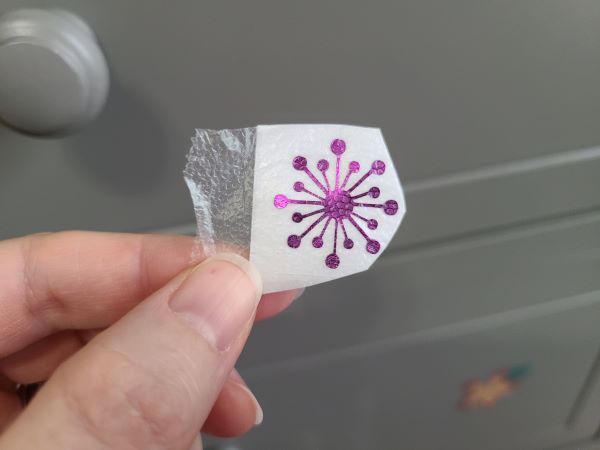
How To Apply The Fourth Layer of Removable Matte Adhesive Vinyl To Your Wood Project?
Following the same process you will attach the center of the flower in the middle of the small flower.
- Trim the adhesive flower center with transfer material on top.
- Place the adhesive flower center in the middle of the small flower.
- Transfer the adhesive flower center by rubbing it with your Cricut rubbing tool.
- Peel the transfer material off of the adhesive flower center.
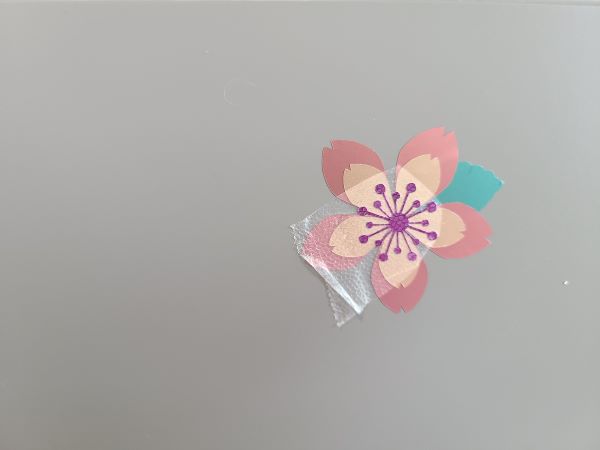
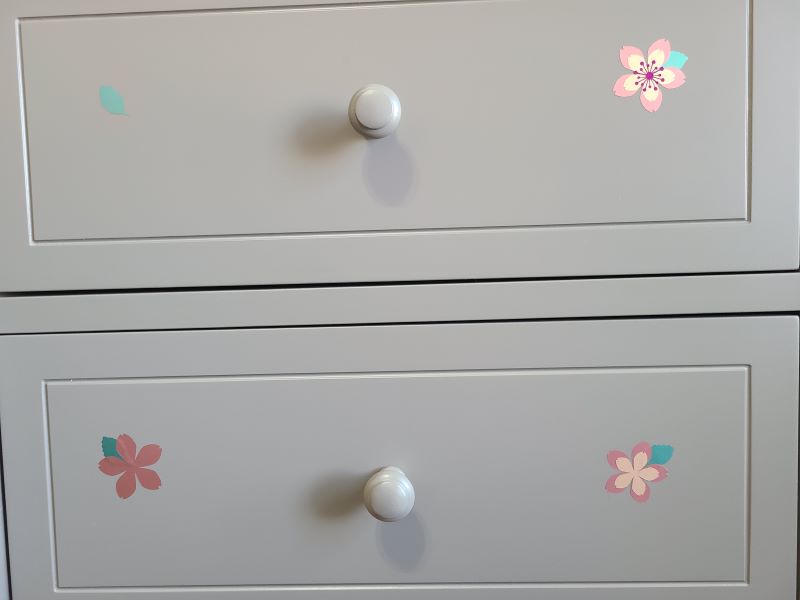
Here you can see each removable matte vinyl layer being applies to the changing table drawers and side panel.
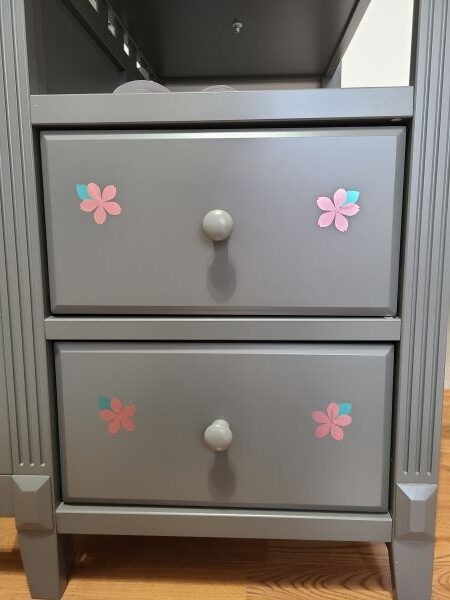
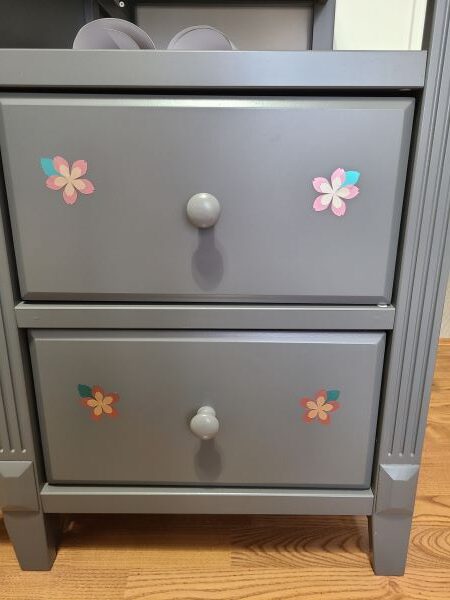
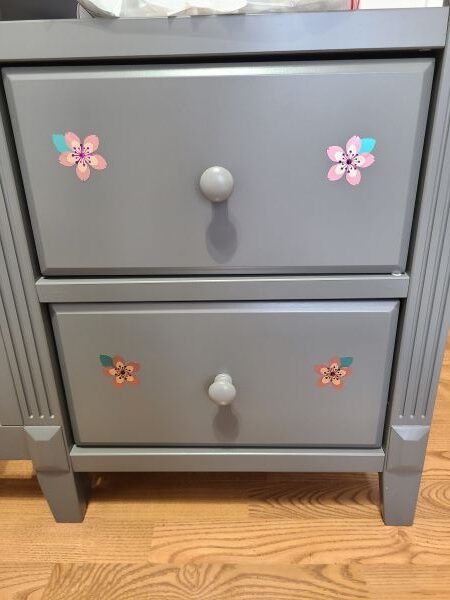
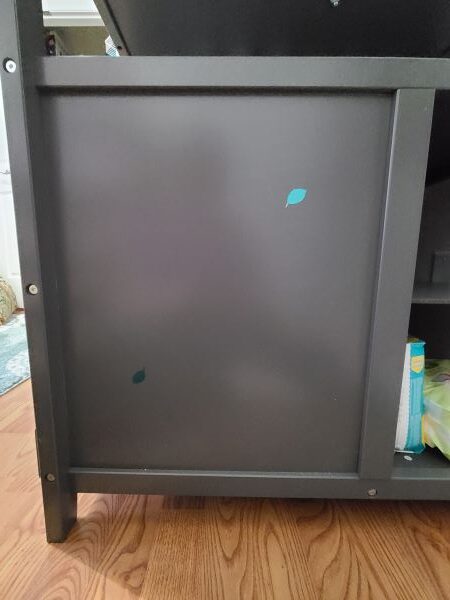
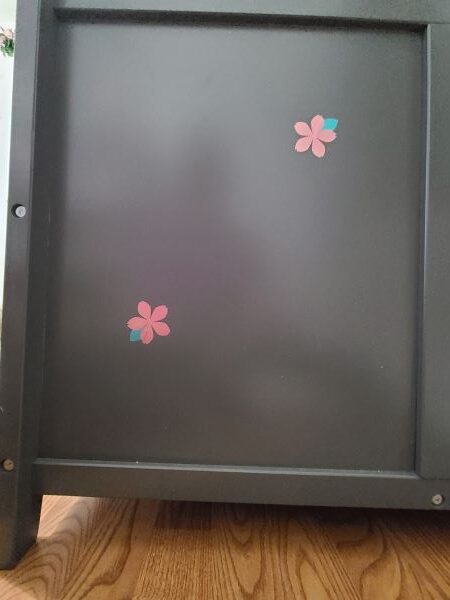
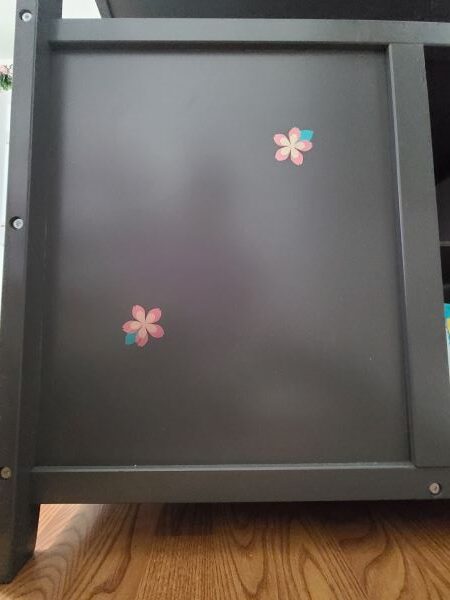
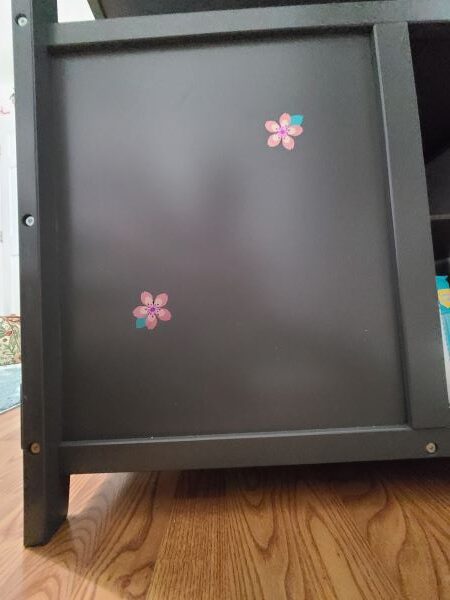
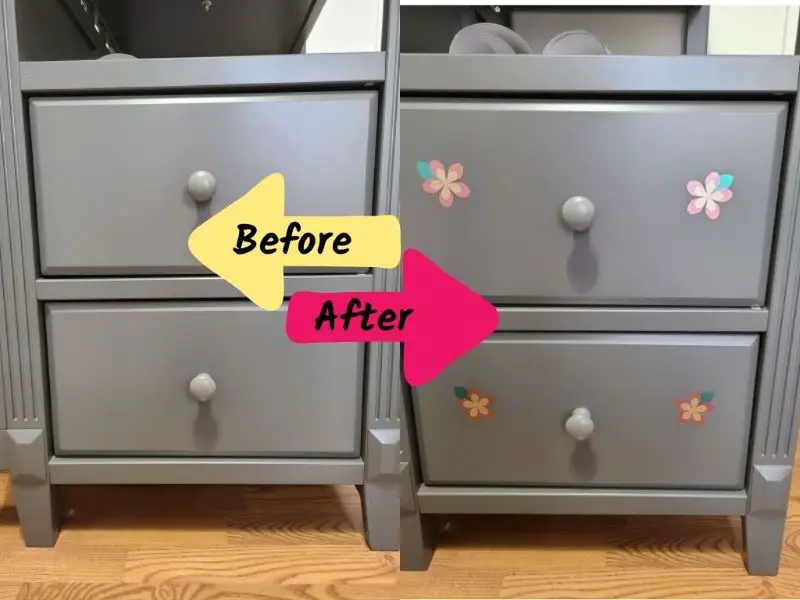
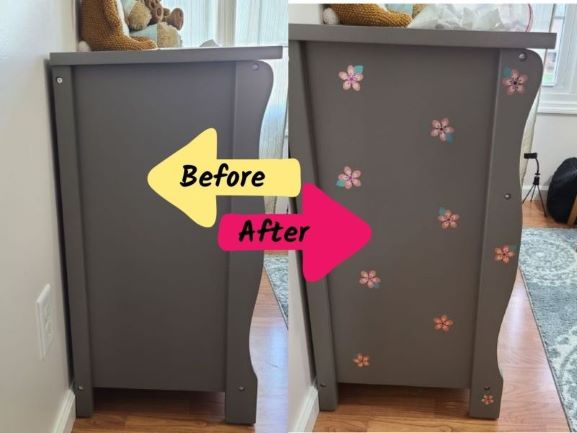
This is what the dresser looks like before and after using the Cricut removable matte vinyl to create custom wood furniture for my daughter’s bedroom. You can see a big difference in how the bedroom furniture looks with and without adhesive vinyl decals. I hope this simple tutorial has motivated you to use your Cricut to create custom furniture of your own!
8 Helpful Tips Before Starting Your Removable Matte Vinyl Project?
- Makes sure to have a clean fine tip blade before cutting a foil project. You can clean your fine tip blade by poking it into a ball of foil.
- Pre-measure the area where you want to attach your vinyl before cutting your design into the vinyl. It can be frustrating when your cut vinyl does not fit your craft project.
- Since this is not an iron-on vinyl, you can cut your removable matte vinyl without the mirror setting. The mirror setting is only needed for iron projects.
- Make sure your removable matte vinyl is shiny side up on your mat, before loading it into your Cricut machine for cutting.
- Wipe down the area where the vinyl will go, with rubbing alcohol and a lint-free cloth or coffee filter. This will help remove any extra dirt and oil from your project area, so your vinyl will attach to your project successfully.
- Make sure the project surface is dry before attaching the removable vinyl!
- Use transfer tape or Glad Press and Seal to remove your vinyl project from the Cricut backing paper to your project surface area.
- If you are doing a large vinyl decal you will want to fold your transfer material like a taco, sticky side down on the outside. Place the transfer material in the center of your vinyl project. This will help avoid air bubbles and creases in your transfer tape.
Are There Craft Projects That Cricut Removable Matte Vinyl Are Not Used For?
Removable matte vinyl and other removable products do not work well on any surfaces that you intend to wash or handle on a regular basis. It works great for projects that requires intricate cut designs and wording. You should also consider if you are going to use or display your wooden craft project outdoors or indoors.
Can You Use Cricut Removable Matte Vinyl For Outdoor Wood Projects?
Outdoor use is not recommended for removable matte vinyl. You should use the Cricut permanent vinyl options for outdoor projects instead. If your custom wood project is going to be showcased outdoors, then you will want to use a Mod Podge clear sealer to protect your finished work.
Can You Use Cricut Removable Matte Vinyl For Indoor Wood Projects?
Removable matte vinyl works the best for indoor projects. You shouldn’t have a problem if you are going to use the custom wooden project indoors. No matter if you are crafting your custom wood project for yourself or to sell, using this removable vinyl from Cricut is a great option.
When Should You Use Cricut’s Removable Matte Vinyl?
You should use removable matte vinyl when you do not want to leave a mark on the item you want to put the vinyl on. For example:
- walls
- temporary window clings
- indoor wood furniture
- wall hangings
- canvas
- doors
- Custom Christmas ornaments
- custom designs for cell phone covers
- The back of a cell phone
This vinyl is great to use indoors, on fragile and pours surfaces for projects that will not be washed.
When Should You Use Cricut’s Permanent Adhesive Vinyl?
You should use Permanent Adhesive Vinyl when you want the custom vinyl design to last on your project. A permanent vinyl project can be hand-washed and exposed to outdoor weather. For example:
- wine glasses
- water tumblers
- any big kitchen appliances
- KitchenAid mixer
- coffee maker
- custom outdoor furniture
- coffee mugs
- mirrors
- car windows
- wood signs
- outdoors signs
- flower pots
The adhesive vinyl will need to cure for 24 to 48 hours. If your try to remove the permanent vinyl after being cured, from your custom design project it can and will leave residue behind. This vinyl is great to use on outdoor projects or on car windows for custom vinyl decals.
Note: Both vinyl types have a shelf life of 2 years on the roll. After that time frame the adhesive on the vinyl does stick as well.
Will Cricut’s Removable Matte Vinyl Leave Sticky Residue On Your Wood Project?
Cricut’s removable matte vinyl will not leave a sticky residue on your wood furniture or on anything you stick it on.
Can You Use Cricut’s Removable Matte Vinyl On Your Walls?
You can use Cricut’s removable matte vinyl on your walls and it will not damage the wall surface. The removable matte vinyl can be removed from your walls without leaving a mark or sticky residue behind.
Want to learn more about Cricut? Check out my other Cricut posts!
What is a Cricut EasyPress 2?
What is a Cricut BrightPad?
What Is Cricut Access?
Which Cricut Machine Is Right For You?
Cricut Pen Adaptor Hack
What is Cricut Infusible Ink and how to use it?
10 Cricut Infusible Ink Hacks
How to Design a Mug with Cricut Infusible Inks In The Oven
How To Use Cricut Removable Matte Vinyl On Your Wood Project? – Illustrated Tutorial
How To Use Cricut Adhesive Foil Vinyl On Wood Furniture? – Illustrated Tutorial
How To Design A Color Changing Mug Using Cricut Infusible Inks
Subscribe to Nerdy Moms United!
Get updates on the latest posts and more straight to your inbox!
I hope you enjoy this illustrated tutorial on how to use Cricut removable matte vinyl on wood furniture! Please share this Cricut craft tutorial on social media because sharing is caring!
I make a commission from purchases made through links in my posts, at no extra cost to you. Read my disclosure for more information.
Looking for more craft project ideas?
-
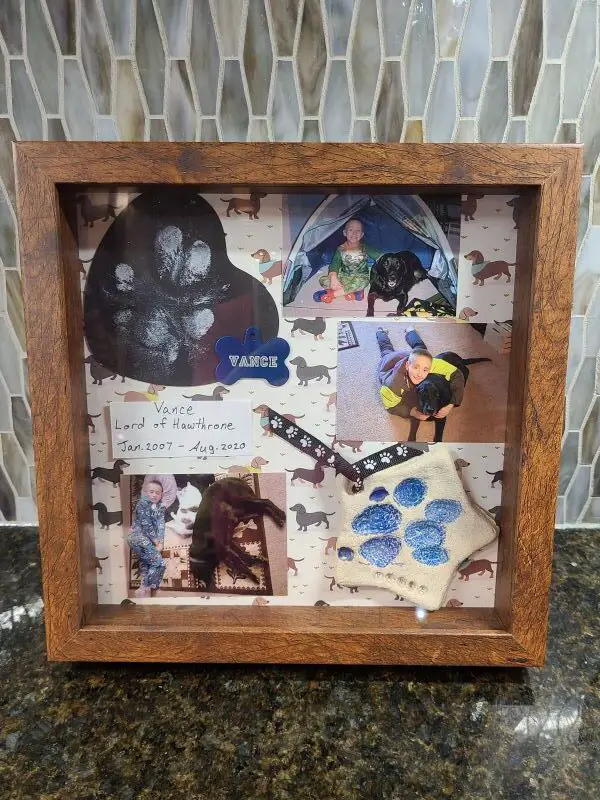
How To Make A Shadow Box Memorial Layout For Your Dog
I will show you how to make a shadow box memorial layout for your dog. This a beautiful way to remember your cherished dog with this shadow box memorial idea for your dog…
-
How To Use Cricut Adhesive Foil Vinyl On Wood Furniture – Tutorial
I will show you step by step how I decorated a painted wooden dresser with Cricut adhesive foil vinyl to create custom wood furniture. I decorated a painted wooden dresser with Cricut adhesive foil vinyl in my daughter’s nursery…
-
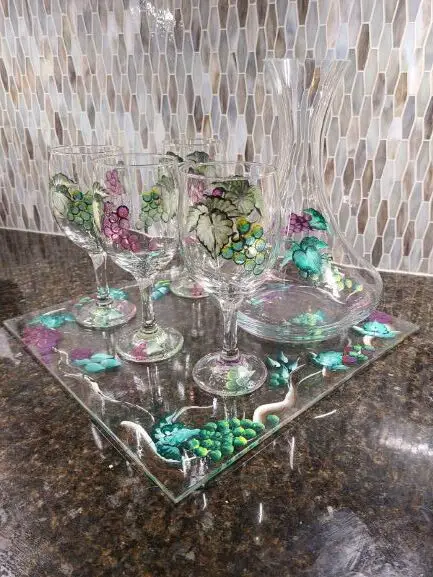
How To Seal Hand Painted Glassware – Illustrated Tutorial
This illustrated tutorial will show you how to seal your hand painted glassware at home the right way. Using acrylic paint to hand paint your own stemware?…
-
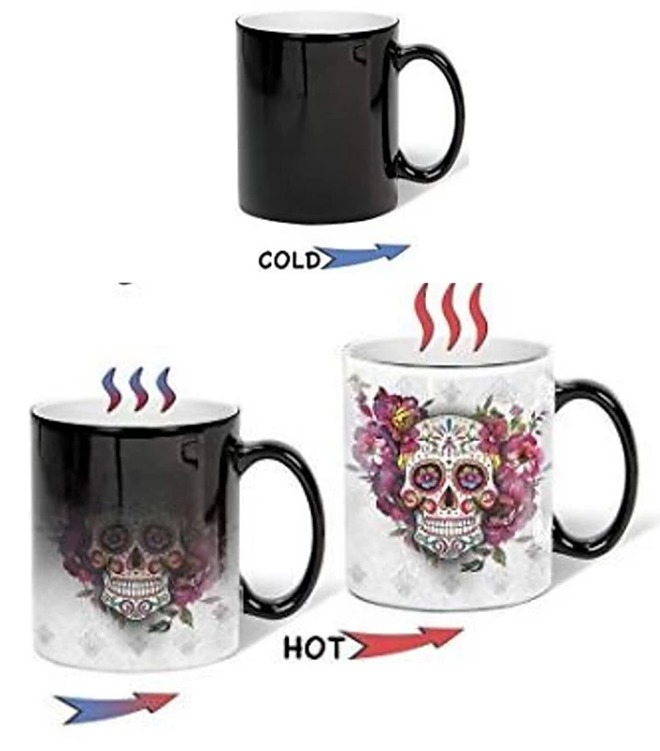
How To Make A Color Changing Mug Using Infusible Ink In The Oven – Tutorial & Video
How to make a color changing mug with Cricut Infusible Ink in the oven. Do you know you can use Cricut Infusible Inks on a mug without a mug press? …
-
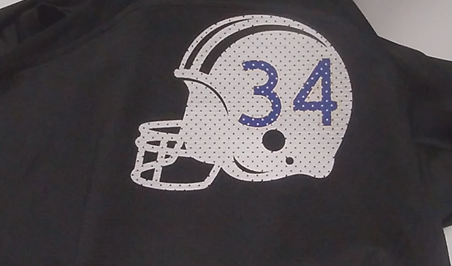
How To Make A Layered Iron-On Vinyl Shirt Using A EasyPress 2 – Tutorial & Video
This layered Cricut EasyPress 2 iron-on mesh vinyl project is perfect if your kids play football. I even created a short video and a Cricut design file so you can make this layered vinyl design for your child too! …
-
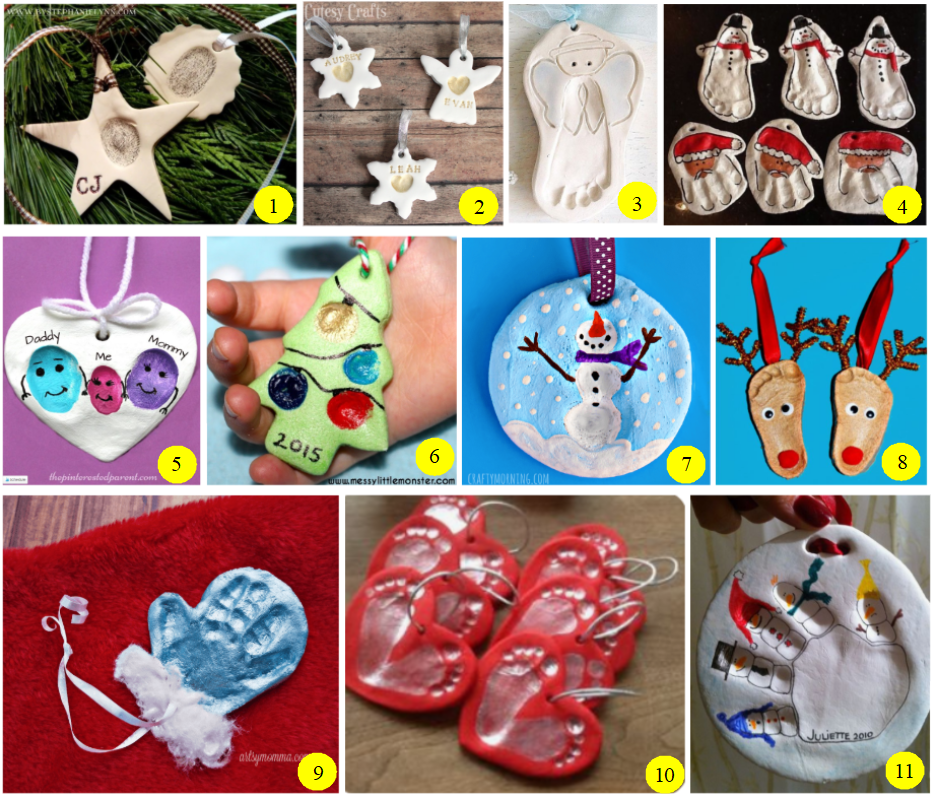
Easy Salt Dough Christmas Ornaments for Kids to Make as Gifts
These beautiful smelling salt dough Christmas ornaments are easy for kids to make as gifts. With this easy salt dough recipe, and several fun crafts ideas that kids can make…