I make a commission from purchases made through links in my posts, at no extra cost to you. Read my disclosure for more information.
I am excited to show you how to make a color changing mug with Cricut Infusible Ink in the oven. Do you know you can use Cricut Infusible Inks on a mug without a mug press? You can use Infusible Inks to decorate a coffee mug but you will need to heat treat the mug in the oven. Make sure the ceramic mug can be used for heat sublimation or the Infusible Inks will not work. Infusible Ink designs are dish washer safe and make great gifts for family members!
First of all, what is Cricut Infusible Ink and how do you use it? Cricut Infusible Ink is a new way of creating your own professional graphic designs by doing ink transfers onto a T-shirt, tote bags, coasters, and more. It does not peel, crack, or wash out of Infusible Ink compatible blanks.
Using the compatible Cricut Infusible Ink transfer sheet or plain white copy paper with your Cricut machine you can create your design with Infusible Ink pens and markers. You can either design and cut with plain white copy paper or cut your design uses one of the patterns Infusible Ink transfer sheet.

Can I Use Infusible Ink On A Mug In The Oven?
You can use Infusible Ink on a heat sublimation mug in the oven at 400 degrees secure with a Mug Wrap. Put the mug upside down in the oven. Set your oven timer for 12 minutes.
Can I Use Infusible Ink On A Regular Mug In The Oven?
A regular blank mug will not be able hold the Infusible Ink and will wash off in the dish washer. You will need to use a heat sublimation mug to use Infusible Ink on a mug. Here are different color-changing heat sublimation mugs you can use for your Infusible Ink project.
color-changing heat sublimation mugs blanks that I found on Amazon
Subscribe to Nerdy Moms United!
Get updates on the latest posts and more straight to your inbox!
Can You Use Infusible Ink On Any Ceramic Blank?
The ceramic item will need to be a heat sublimation blank for the Infusible Ink to work on it. Ceramic heat sublimation blanks are treated with a special poly-coated base that allow the Infusible Inks to adhere to it. Without the poly-coated base the Infusible Ink will wash off the ceramic surface.
Supplies You Will Need to Make a Color Changing Mug Using Cricut Infusible Ink in the Oven
These are the items you will need to make an Infusible Ink design on your color-changing coffee mug in the oven. I have included all the links to where you can get your supplies on Amazon by just clicking on the items:
- Cricut Machine – If you don’t have a Check out this Cricut Machine post!
- Infusible Ink Pattern Transfer Sheet or Plain white copy paper
- Cricut cutting mat
- Bucher paper
- Cricut Heat Resistant Tape or other Heat Resistant Tape
- Rubbing alcohol
- Desk Fan (This is the one I use!)
- Oven thermometer (The oven has to be at an exact temp to transfer the design.)
- Mug Wrap (This applies pressure to the transfer paper so the design will show up on the mug!)
- 11oz. Black & Blue mugs
Here are 11 oz. black and blue mugs you can select from to put your designs on. Then you can sell or give the mugs as gifts! When these mugs are heated they will turn white and design will be seen.
If you want to do this project with a white mug in the oven that doesn’t change colors then you will want to check out this Infusible Inks mug post for those instructions!

How To Make A Color Changing Mug Using Cricut Infusible Ink in the Oven
Here are the step by step process on how to make your own color-changing coffee mugs in the oven using Infusible Ink. Then you can sell or give the mugs as gifts! When these mugs are heated they will turn white and design will be seen.
- Using your Cricut Design Space software select or create your design for your mug.
- Measure your mug to make sure your design will fit.
Tip: Make sure to leave 1/4 inch of space for the top, bottom, and mug handle all round the edge of your design. Very important if you want your design to look even on the mug. - Place a piece of plain white copy paper or Infusible Ink pattern transfer sheet on your Cricut cutting mat.
- On Cricut Design Space click the Make It” button. Load your cutting mat into your Cricut machine.
- Following the Cricut Design Space instructions.
Note: If you are using the Infusible Pens or Markers for your design, load it in the Cricut machine per the Cricut Design Space instructions. Load each Pen or Marker color when prompted, if you are using multiple colors. - Preheat your oven to 400 degrees and place your oven thermometer in the oven.
- When your design is finished unload load your Cricut mat.
- Wipe the mug surface with rubbing alcohol and allow it to dry.
- Trim your design keeping the 1/4 inch of space and place you design on the mug.
- Secure your design to the mug using heat resistant tape.
- Put your Mug Wrap flat on the table and trim the butcher paper and place on top of the Mug Wrap.
- Lay your mug on top of the Mug Wrap with the mug handle pointing up.
- Check the oven thermometer, it will need to be at 400 degrees for this process to work correctly. If the oven is not at 400 degrees wait until it is.
Tip: The oven temp is very important for this process, 400 degrees is your magic temp. - Secure the Mug Wrap to the mug and put the mug upside down in the oven. Set your oven timer for 12 minutes.
Note: Heat always rises! Putting the mug upside down in the oven helps the image transfer better to the mug because of the airflow. - When your mug is done curing in the oven, remove it, and place it on a heat-safe surface.
Warning: The mug will be very hot!! - Remove the Mug Wrap and papers.
- Place your mug in front of your desk fan to cool down. Using a fan will protect your mug from getting hairline cracks during the cool-down process. Don’t submerge the mug in water while hot!
- Once your mug has cooled, it will turn back to its original color and the design will be hidden.
- Enjoy your new custom-designed mug, it is ready to use, sell, or give away as a gift!
Want to get Cricut Infusible Ink product? Get Cricut Infusible Ink here!
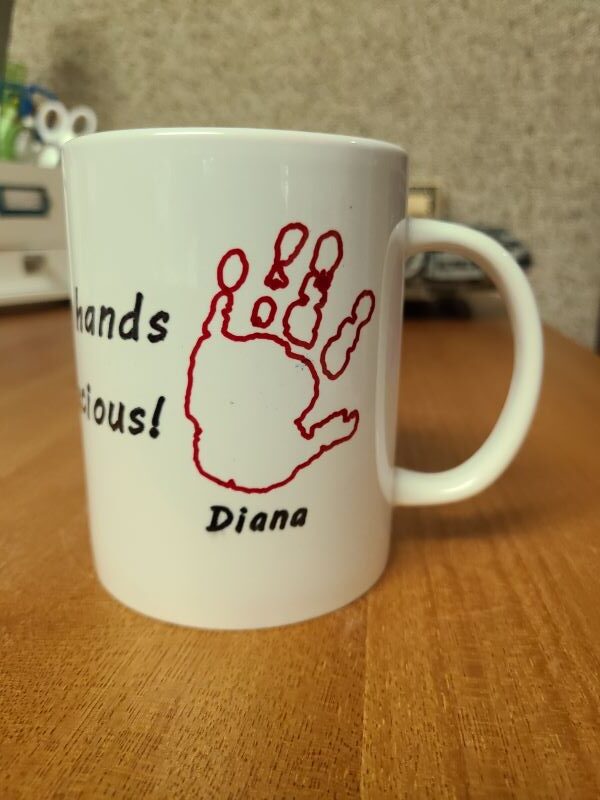
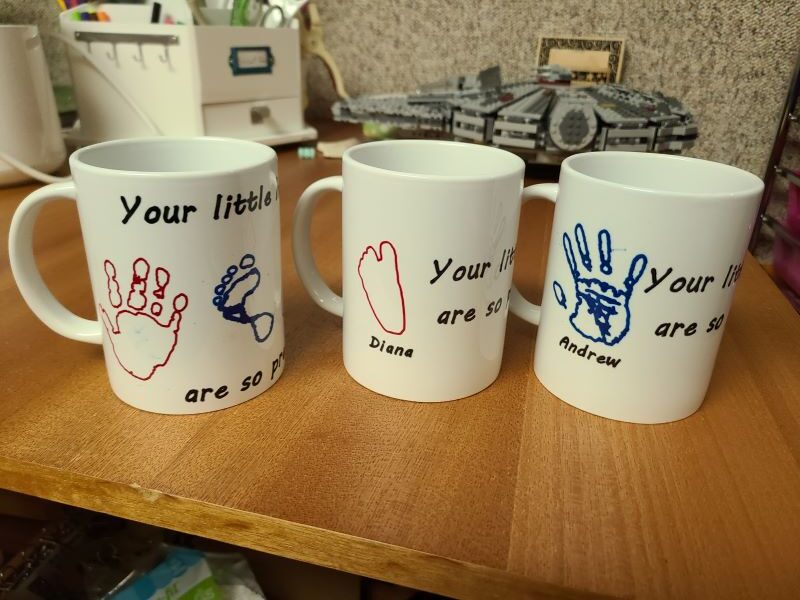
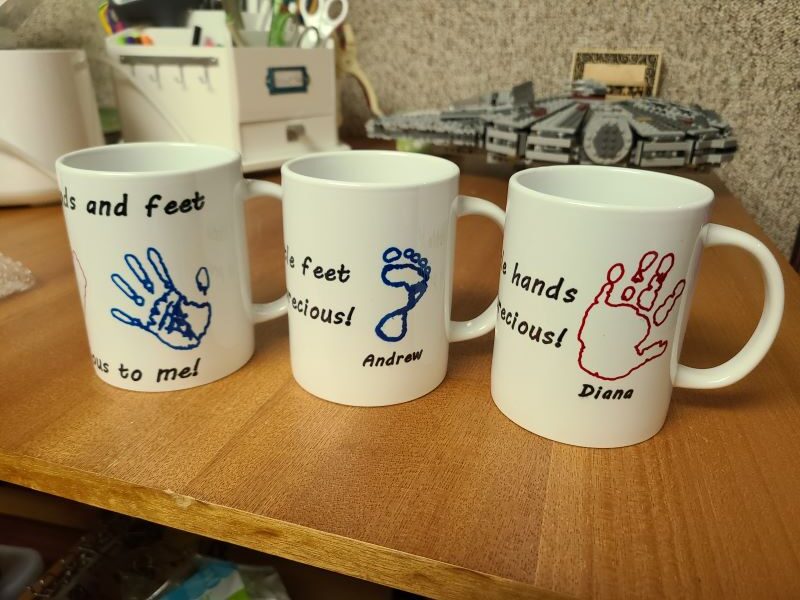
Here are the mugs I made with my kids hands and foot prints as grandparent gifts using Cricut Infusible Ink and my Cricut Machine.


How to Make a Color Changing Mug Using Cricut Infusible Inks in the Oven – Video
Here is a great video from Southpaw’s Studio showing you how to make you custom Infusible Ink mug in the oven. The same concepts applies if you are using a regular oven vs the oven he use in his video.
Want to learn more about Cricut? Check out my other Cricut posts!
What is a Cricut EasyPress 2?
What is a Cricut BrightPad?
What Is Cricut Access?
Which Cricut Machine Is Right For You?
Cricut Pen Adaptor Hack
What is Cricut Infusible Ink and how to use it?
10 Cricut Infusible Ink Hacks
How to Design a Mug with Cricut Infusible Inks In The Oven
How To Use Cricut Removable Matte Vinyl On Your Wood Project? – Illustrated Tutorial
How To Use Cricut Adhesive Foil Vinyl On Wood Furniture? – Illustrated Tutorial
How To Design A Color Changing Mug Using Cricut Infusible Inks
Subscribe to Nerdy Moms United!
Get updates on the latest posts and more straight to your inbox!
I hope you enjoy this illustrated tutorial on how to use design a color changing mug using Cricut Infusible Inks in the oven! Please share this Cricut craft tutorial on social media because sharing is caring!

I make a commission from purchases made through links in my posts, at no extra cost to you. Read my disclosure for more information.
Looking for more craft project ideas?
-
How To Make A Shadow Box Memorial Layout For Your Dog
I will show you how to make a shadow box memorial layout for your dog. This a beautiful way to remember your cherished dog with this shadow box memorial idea for your dog…
-
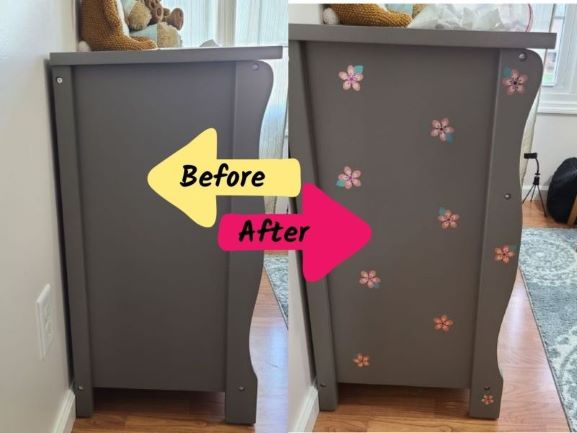
How To Use Cricut Adhesive Foil Vinyl On Wood Furniture – Tutorial
I will show you step by step how I decorated a painted wooden dresser with Cricut adhesive foil vinyl to create custom wood furniture. I decorated a painted wooden dresser with Cricut adhesive foil vinyl in my daughter’s nursery…
-
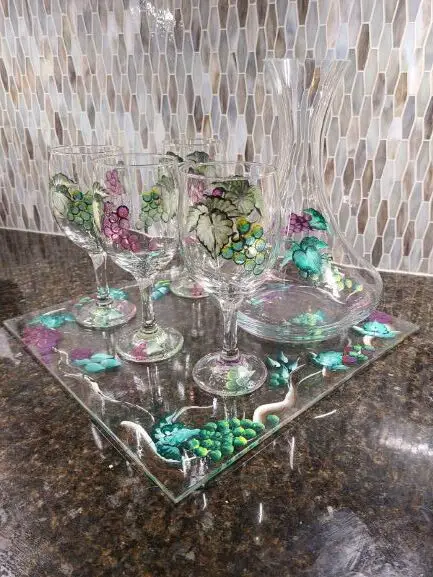
How To Seal Hand Painted Glassware – Illustrated Tutorial
This illustrated tutorial will show you how to seal your hand painted glassware at home the right way. Using acrylic paint to hand paint your own stemware?…
-

How To Make A Color Changing Mug Using Infusible Ink In The Oven – Tutorial & Video
How to make a color changing mug with Cricut Infusible Ink in the oven. Do you know you can use Cricut Infusible Inks on a mug without a mug press? …
-
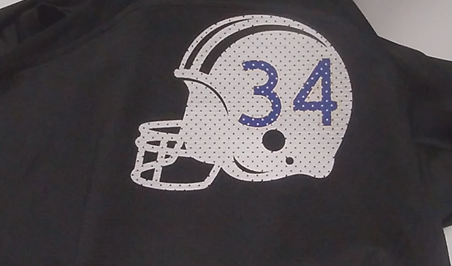
How To Make A Layered Iron-On Vinyl Shirt Using A EasyPress 2 – Tutorial & Video
This layered Cricut EasyPress 2 iron-on mesh vinyl project is perfect if your kids play football. I even created a short video and a Cricut design file so you can make this layered vinyl design for your child too! …
-
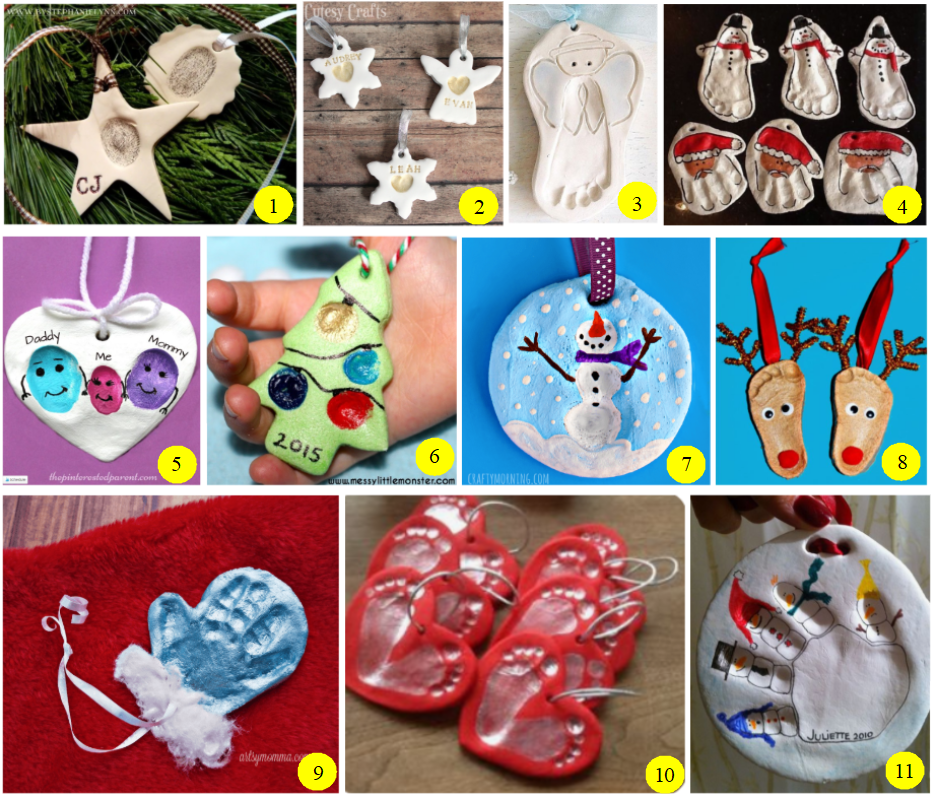
Easy Salt Dough Christmas Ornaments for Kids to Make as Gifts
These beautiful smelling salt dough Christmas ornaments are easy for kids to make as gifts. With this easy salt dough recipe, and several fun crafts ideas that kids can make…